Directive Website Kit · start here
Set up once.
Then make it yours.
This page covers the part your assistant cannot do for you: the accounts, and getting the kit onto your laptop. Work through it in order. At the end you paste one message, and the kit runs the rest.
Do this a couple of days before you want to be live. One of the accounts below can have a waiting period that nobody can shorten.
01 Your assistant
One assistant does the work. You need one of two.
Claude Code, inside the Claude desktop app, is the recommendation, because the kit’s instructions describe its layout. Codex, inside the ChatGPT desktop app, works too and costs nothing to try.
If you already pay for one of them, use that one and carry on to the next section. If you do not, the assistants page has the download links, what each costs and the one extra thing Windows needs.
02 Two accounts and one free program
All free, and one of them has a waiting period.
Nothing here needs a card, and you type both passwords yourself. Your assistant never types a password.
Required · free · do this first
A Cloudflare account
Where your website actually lives, on the free plan, with no hosting fee. Sign up at dash.cloudflare.com/sign-up with an email and a password, and click the link in the verification email.
Make this account at least two days before you want to go live. Cloudflare sometimes holds a brand-new account back from publishing for a day or two, as protection against abuse, and there is no way to hurry it along. Nothing else is affected, so make the account now and carry on with everything else.
Required · free · five minutes
A GitHub account
Where every version of your website is saved, and what lets you undo anything later. Sign up at github.com/signup. Pick a sensible username, because it appears in your project's address. No phone number is needed. Click the link in the email they send.
Required · free · five minutes
Node.js
Node runs the checking program that reads your finished page before it goes live: the colour contrast, the layout on a phone, the leftovers from the sample business. Without it the kit will not publish, so it is worth doing now rather than at the last step.
Install the current LTS version from nodejs.org. On Windows, download the installer and click Next on every screen. On a Mac, the same, or brew install node if you use Homebrew. Then quit your assistant completely and open it again, so it can see the new install. That restart is not optional, and it is usually the whole fix if the kit says Node is missing after you have installed it.
Required on Windows · free · five minutes
Git, and on a Mac a one-line sign-in
Windows. Claude Code will not start without Git. Install it from git-scm.com, accepting every default, before you open your assistant.
Mac. Git is usually already there. What is often missing is a way for your laptop to prove who you are the first time it saves to GitHub, which otherwise stops with a password prompt that your GitHub password will not answer. Tell your assistant “sign me in to GitHub” and it will walk you through it, or run brew install gh and then gh auth login in Terminal and answer the handful of questions.
Helpful, not required
Your material, roughly to hand
A logo, some photos, your list of services, your contact details, and a nice thing a customer said. If you have none of that, carry on anyway: every design is built to look finished without a logo, without photos and without a testimonial, and photos can be added later in a couple of minutes.
03 Get the kit onto your laptop
Two ways in. Both end in a folder you own.
Start from your library. The download path needs no GitHub account at all; the GitHub path gives you version history from the first minute. You can start with the download and add GitHub later, which the kit will offer to do for you.
Path A · simplest
Download the zip
- In your library, under Website Kit, click Download kit. It lands in your Downloads folder, as
directive-website-kit.zip. - Right-click the zip, choose Extract All, then open folders until you see a file called
AGENTS.md. That is the folder to open in your assistant. On a Mac, double-click the zip instead and the same folder appears beside it. - Move that folder somewhere permanent, such as Documents, and rename it after your business: lower case with hyphens, like
smith-plumbing. KeepAGENTS.mdsitting directly inside it. That is how your assistant knows what it is looking at. - Download your designs from the same page and leave the zip where it is for now. Your assistant will put them in the right place.
You will still need the GitHub account for the going-live step. Your assistant walks you to it when the time comes, and will offer to start saving versions of your work straight away.
Path B · if you know GitHub
Connect GitHub
- In your library, click Connect GitHub and type your GitHub username.
- GitHub emails you an invitation to the kit’s repository. Click the link and accept it.
- On the repository page, click the green Use this template button. GitHub opens the page for creating your copy.
- Name it after your business, lower case with hyphens. Choose Private: the folder will hold your working notes and your own files. Leave the branches box unticked.
- Then get it onto your laptop, either by cloning it or with Code then Download ZIP. If you are not sure how to clone, take the address of your new repository and let your assistant do it in step 05.
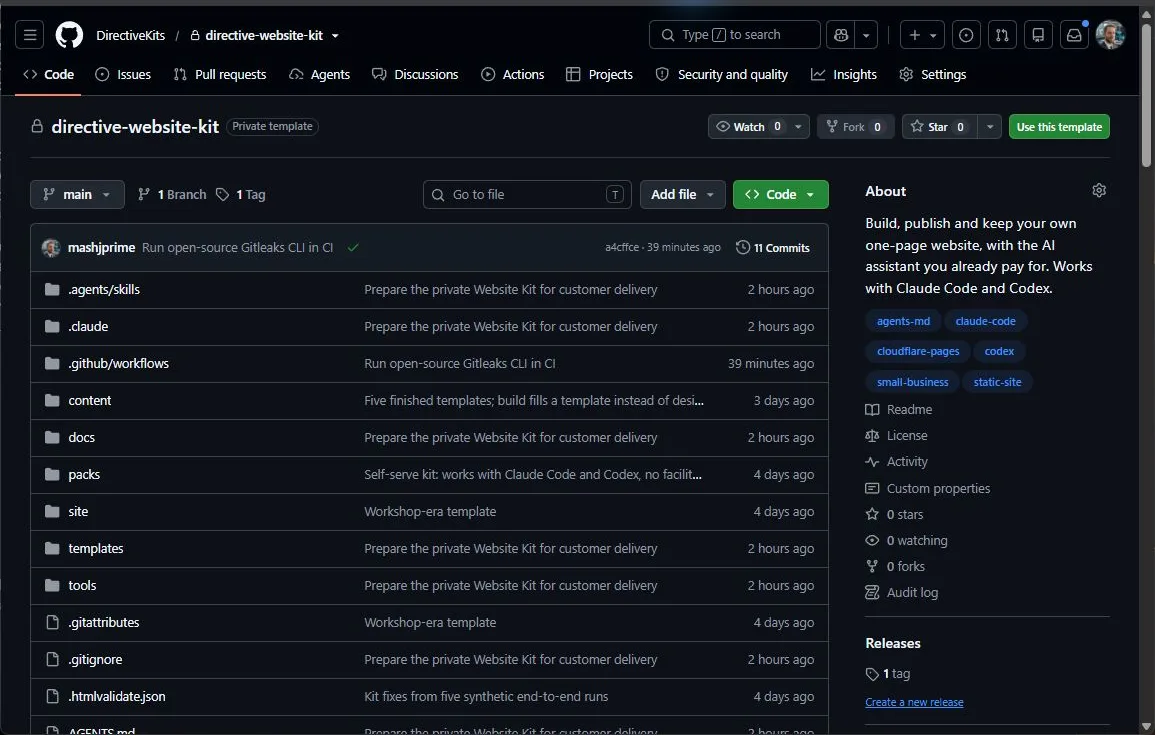
Keep your copy private either way. The folder ends up holding your brief, your photographs and your working notes.
04 Open the folder
Point your assistant at that folder.
In the Claude desktop app
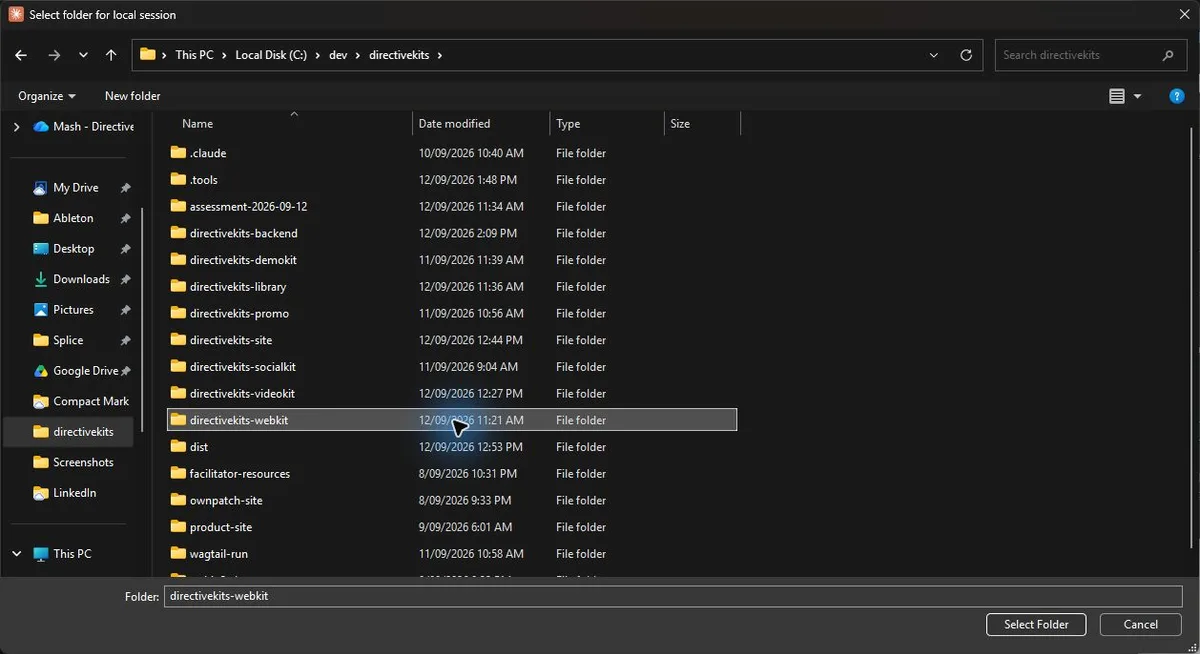
Open the app and click the Code tab. Click Local, then No folder, then Open folder…. Find the kit folder you just made and open it. If it asks whether you trust the folder, say yes: it is your folder, and you put it there.
In the ChatGPT desktop app
Open the app and switch to Codex. Under Projects, use the folder button to add a local project and choose the kit folder you just made. Open that project, start a chat and keep Local selected. If it asks whether you trust the folder, say yes.
05 Paste this
One message, and the kit takes over.
Copy this into the chat and send it. You do not need to change anything in it.
I have the Directive Website Kit in this folder. Read AGENTS.md and begin with the start skill.
Your assistant will read the folder, work out which app it is running in, and ask you one question: whether you have used GitHub before. Answer honestly. It changes how much gets explained along the way, and nothing else.
If you took Path B and have an empty folder plus a repository address, add a second line to the message: First clone https://github.com/yourname/your-repo into this folder. On Windows a browser window will open asking you to sign in to GitHub. That is expected the first time.
That is the setting-up finished. You can stop here and come back when you have an afternoon.
06 What you will see
Chat on the left. Your website on the right.
From the build step onwards, your assistant opens a preview beside the conversation and reloads it after every change. You watch the page appear, say what you would change, and it changes.
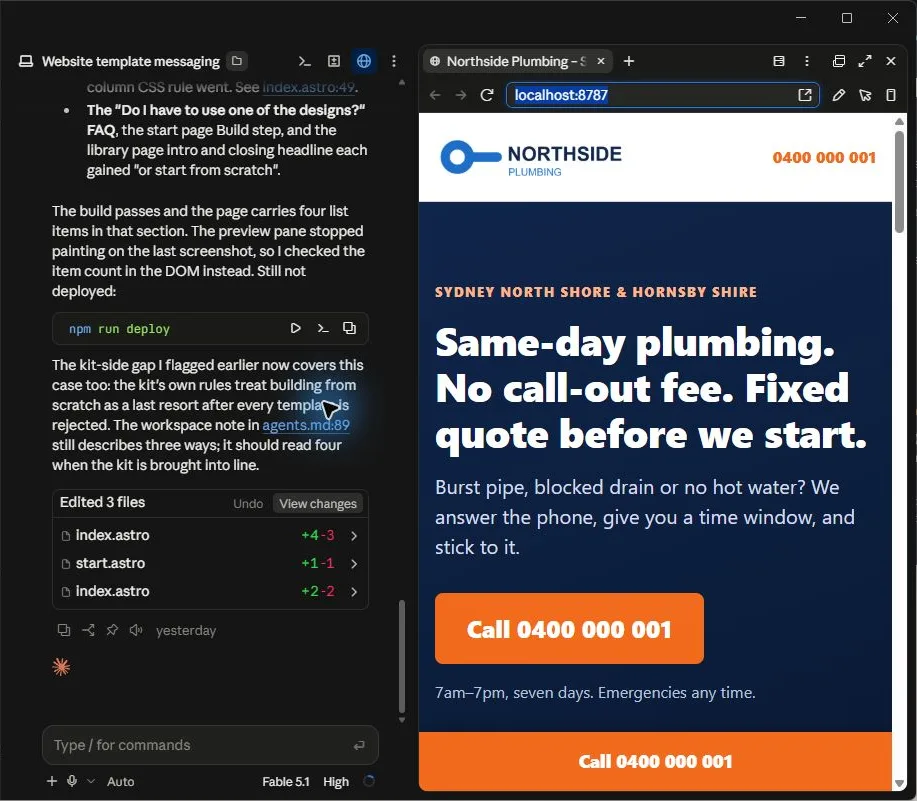
Before the site exists, the pane shows your progress
Until there is a page to look at, the same pane shows where you are up to and the facts your assistant has collected about your business. The website replaces it from the build step on.
PROGRESS.md is where it keeps its place
A plain file in your folder that records which step you are on, what has been decided and what is still open. It means you can close the laptop at any point, come back days later, say hello, and be told exactly where you stopped. It also means a fresh session is never a fresh start.
Using Codex instead?
The same thing happens in the ChatGPT desktop app's own browser. Your assistant starts the preview and opens the address itself rather than reading it from a file in the kit. If you are working in a terminal window instead of either desktop app, there is no pane: your assistant will talk you through your own browser and ask what you can see.
07 What happens next
Eight steps, and you can stop after any of them.
The times are estimates, and the middle steps are the ones that vary: they depend on how much you have thought about what the site should say.
Step 1 · about 15 minutes
Start
It works out which assistant it is, whether it can see a browser, and whether everything is installed and connected. It asks how familiar you are with this sort of thing and adjusts how much it explains. Anything missing, it tells you in plain words what to do.
Step 2 · about 30 minutes
Discover
An interview, one question at a time, written down as you go. The most important question is the one about what must never appear on the website. Say a home address, a personal mobile, prices. It records the kind of thing, never the thing itself.
Step 3 · about an hour
Build
You choose where to start. You are shown the designs that suit your trade and pick one, or you give it the address of the website you already have and it rebuilds that, or you start from scratch and describe what you want. It builds, you watch the page appear, and then you say the first thing you would change.
Step 4 · about 15 minutes
Review
The checking pass. A program reads the finished page and gives a verdict, and most of it you never see, because your assistant fixes what it finds and tells you afterwards in three or four lines.
Step 5 · about 30 minutes
Deploy
Going live. You click every button and type every password; it reads the screen and says what is next. At the end you get an address, and the first thing to do is open it on your own phone.
It also writes you a file called YOUR-SITE.md: one page saying what you own, where each piece of it lives, and how to get back to it.
Step 6 · about 10 minutes
Update
You make one small change straight away, while it is all fresh, and watch it appear on the live site a few minutes later. This is the loop you will use forever, so it is worth doing once with help.
Step 7 · whenever you like
Your own web address
Swapping the free address for your own. Do it on a weekday morning, and if you have email on that domain, say so at the start: the whole step is arranged around not breaking it.
Step 8 · once the site is live, then any month
Getting found
Telling Google and Bing your site exists, rather than waiting for them to notice. Your assistant hands them your sitemap, which is a small file listing what is on your site, through Google Search Console and Bing Webmaster Tools while you click. It sets up your Google Business Profile, then runs a free scan that says how readable your site is to search engines and to AI assistants, and reads the report back to you in plain words.
After that it is a loop rather than a step: come back any month, say “improve and fix the site”, and it works through what has changed and what is worth doing next.
If you get stuck
Something not going to plan?
Tell your assistant what is on the screen first. It can talk you through most of it, and it has a help skill of its own for the rest.